Running the Race: An Inpainting Adventure
I wanted to share some of the experiences I've had with a recent AI art piece. There's a technique called "inpainting", which I still didn't have much experience with. This project was a good chance to learn more about it, and what sort of challenges you encounter.
What is Inpainting?
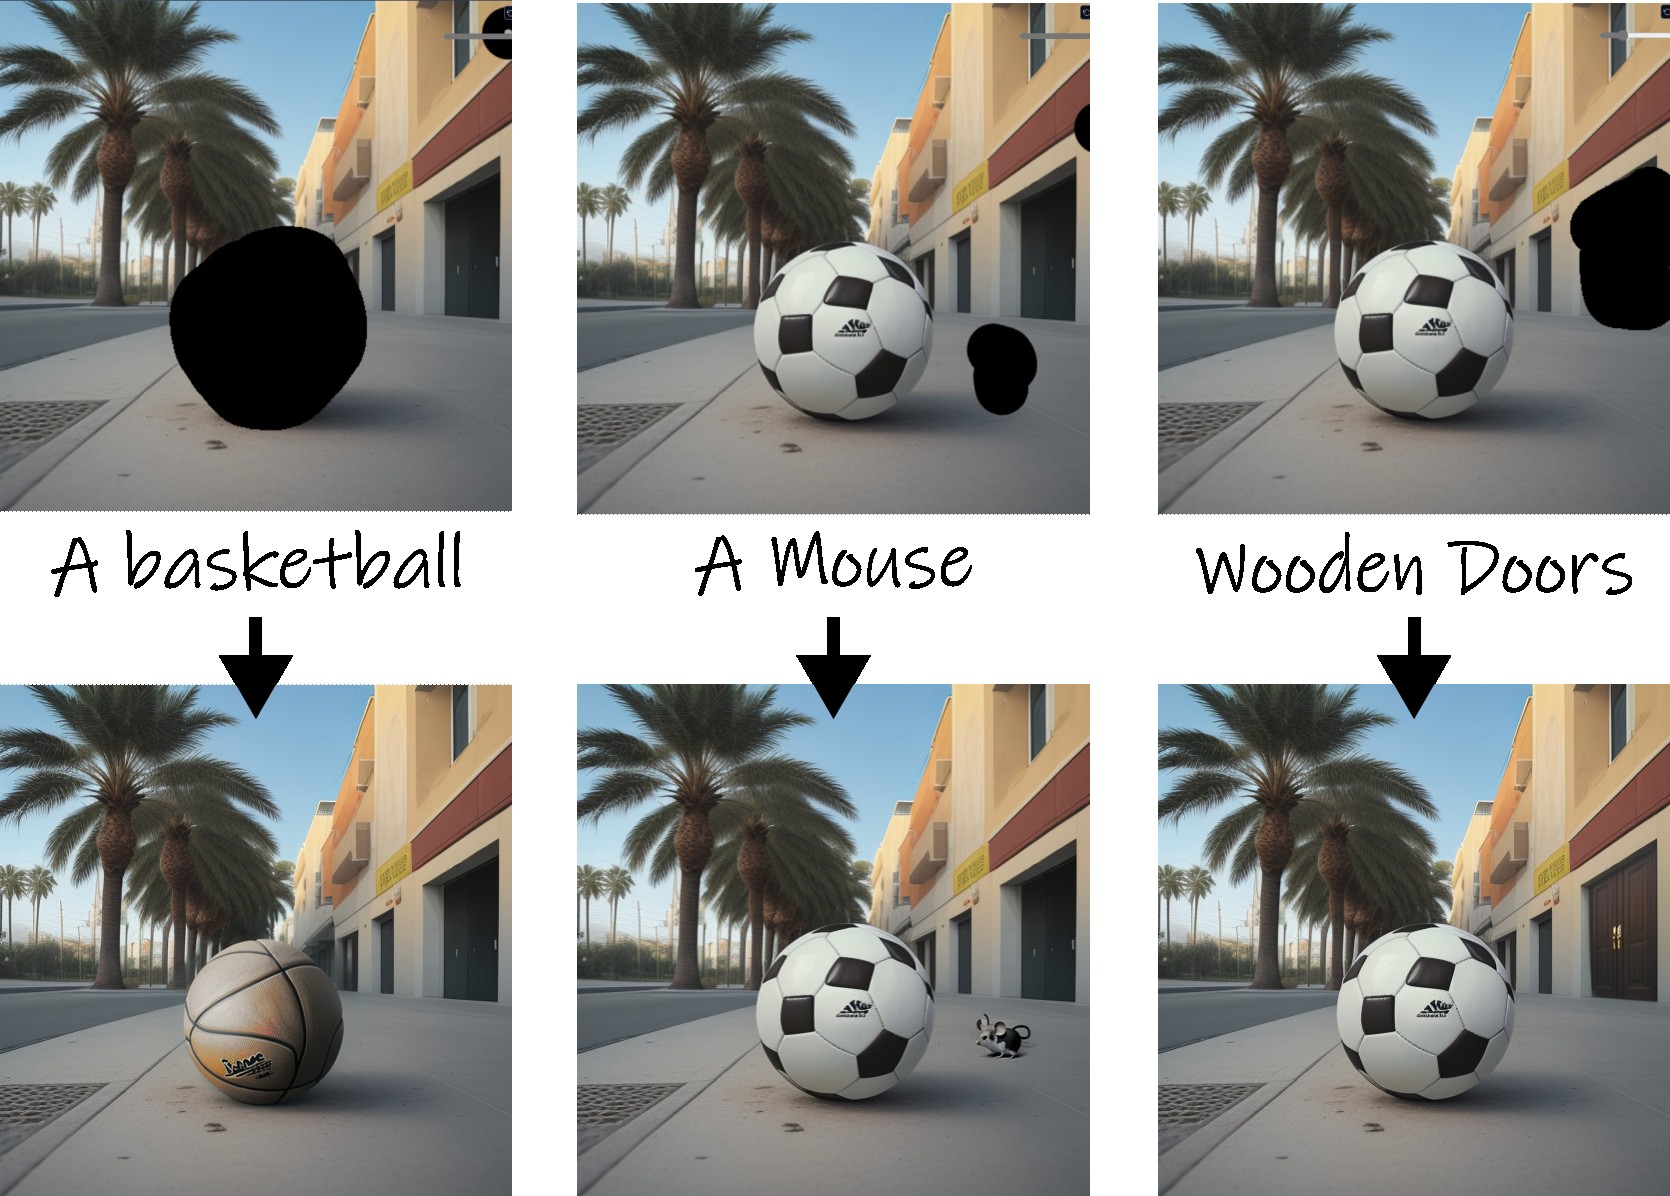
Inpainting is a feature of most generative art systems that lets you pick a part of an existing image and regenerate it. You can use it to make small or large changes to an image. A few examples.
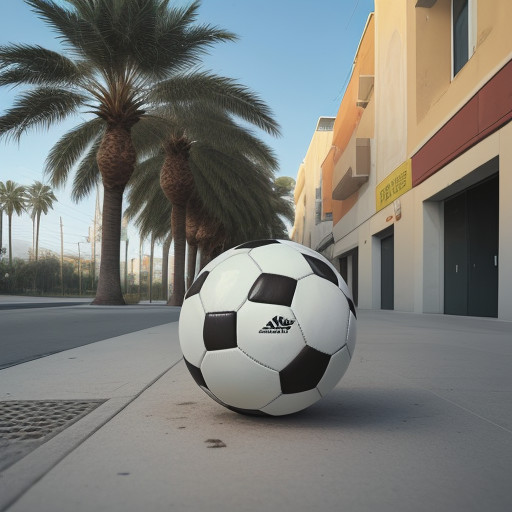
We start with an ai-generated soccer ball, and paint over ("mask") the parts I want to regenerate.
If I mask different parts of the image and provide the AI with new prompts for what I want, I can change the ball to a basketball, I can add a mouse to the scene, or change the style of the doors.
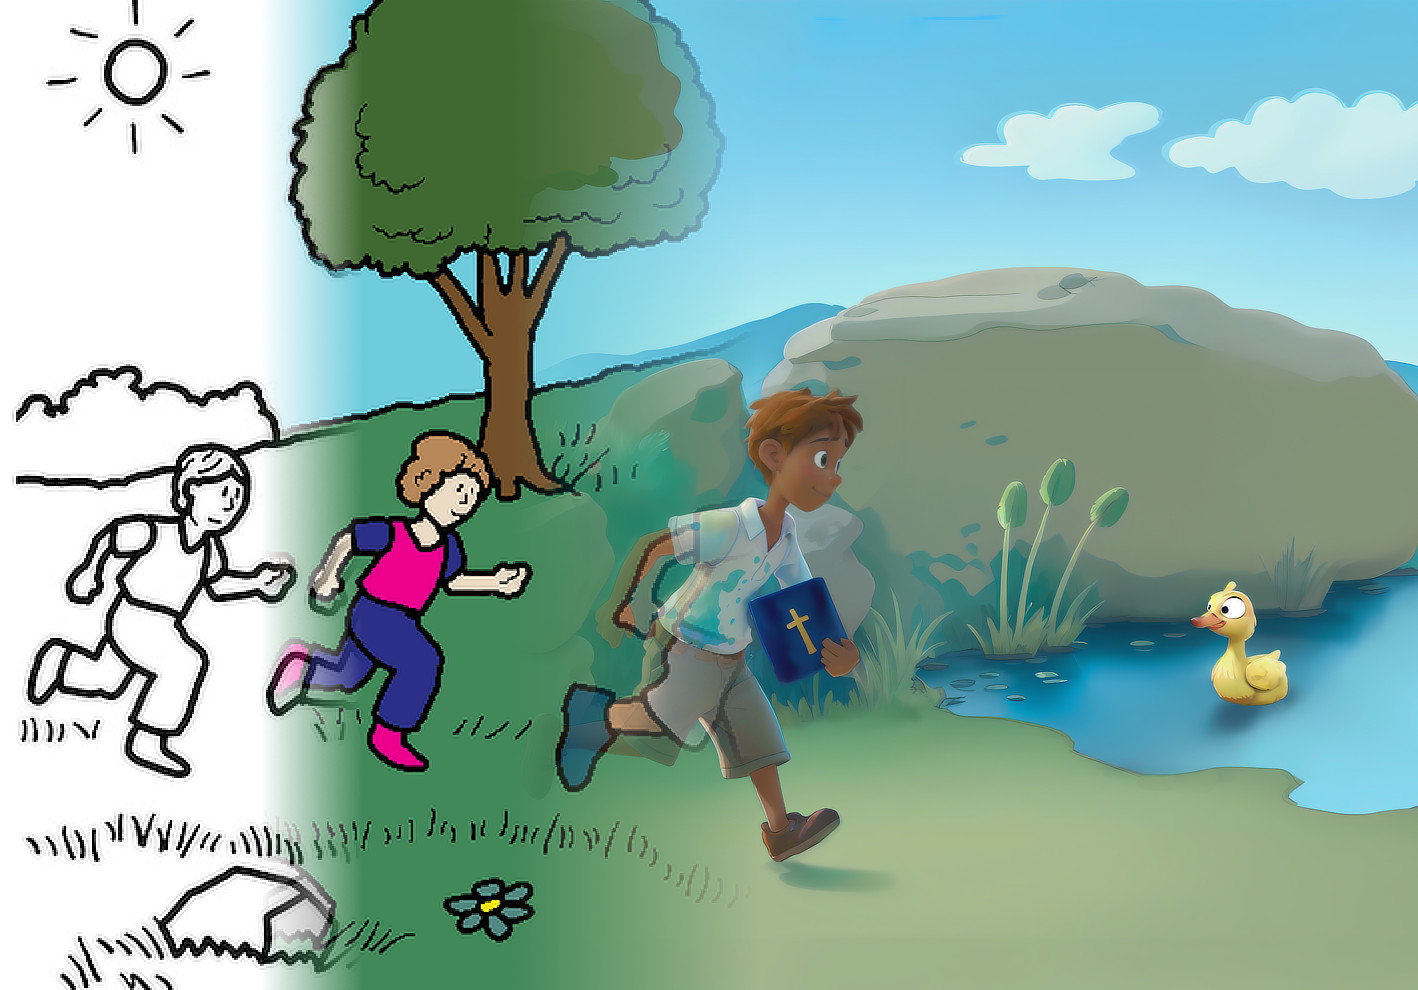
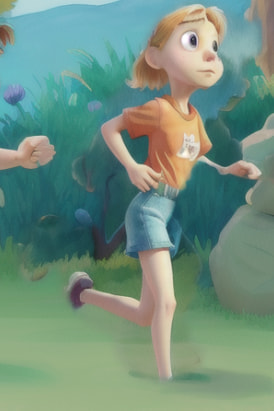
My daughter was reading our church's children's bulletin, and noticed it had a "secret code" for a website that has activities for kids. One of the activities is a virtual coloring book. She had fun coloring in that Sunday's picture (along with some creative input from her brother).
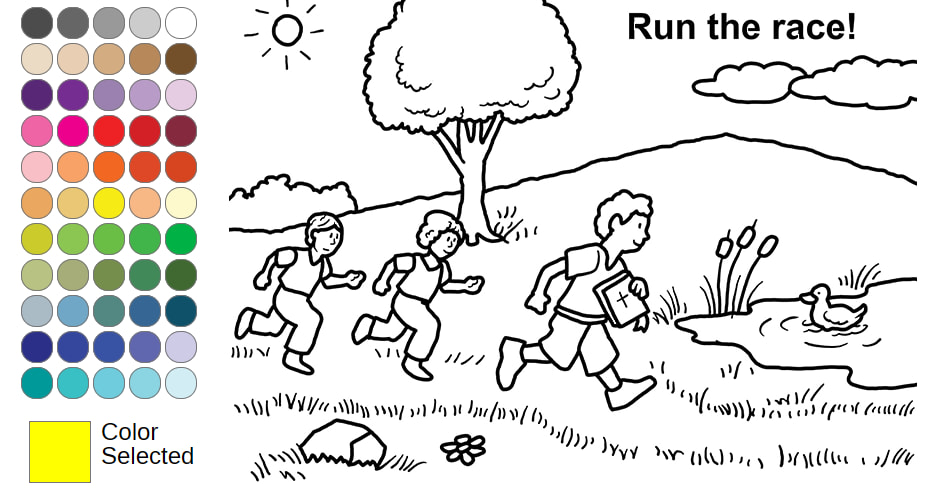
Here's her finished piece:
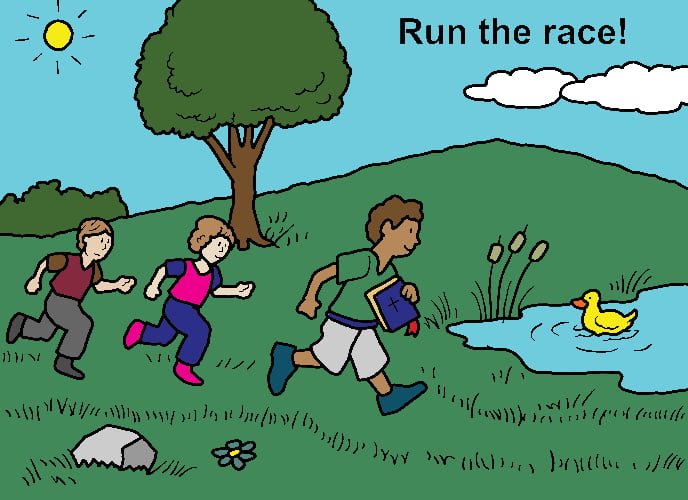
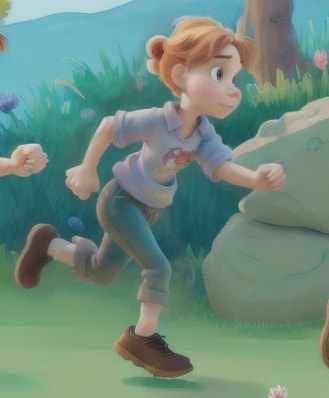
And it looks really good! I thought it would be fun to use it as input for Stable Diffusion, so I generated some images with the prompt:
watercolor illustration by bill watterson of boy and girl children running near a pond with a duck, rocks in the foreground, blue sky, clouds, flowers, cattail, one boy holding a bible, style of calvin and hobbes
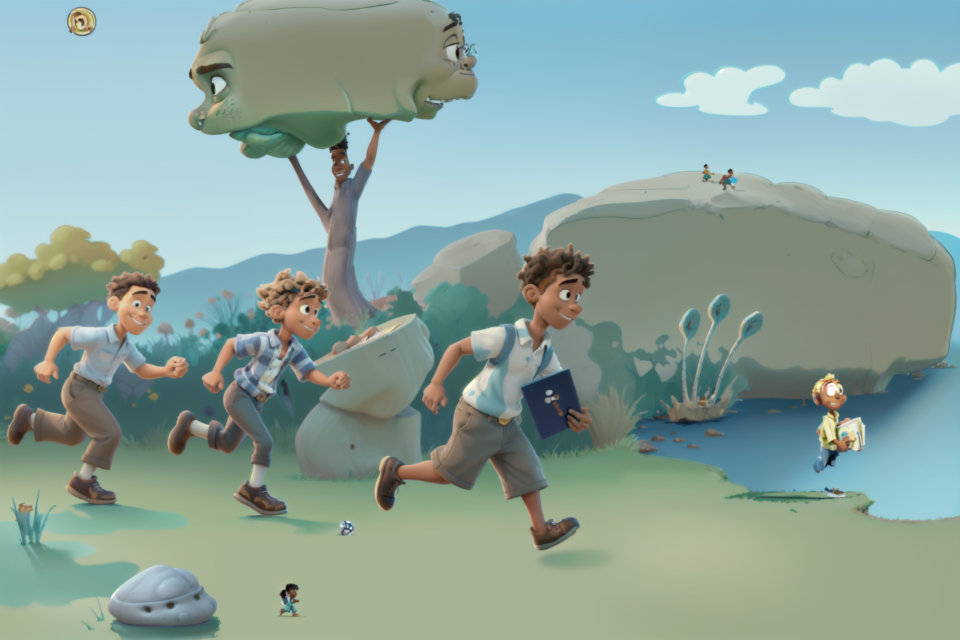
After several different attempts, I decided to use an image that was created with a "Disney/Pixar Cartoon" model.
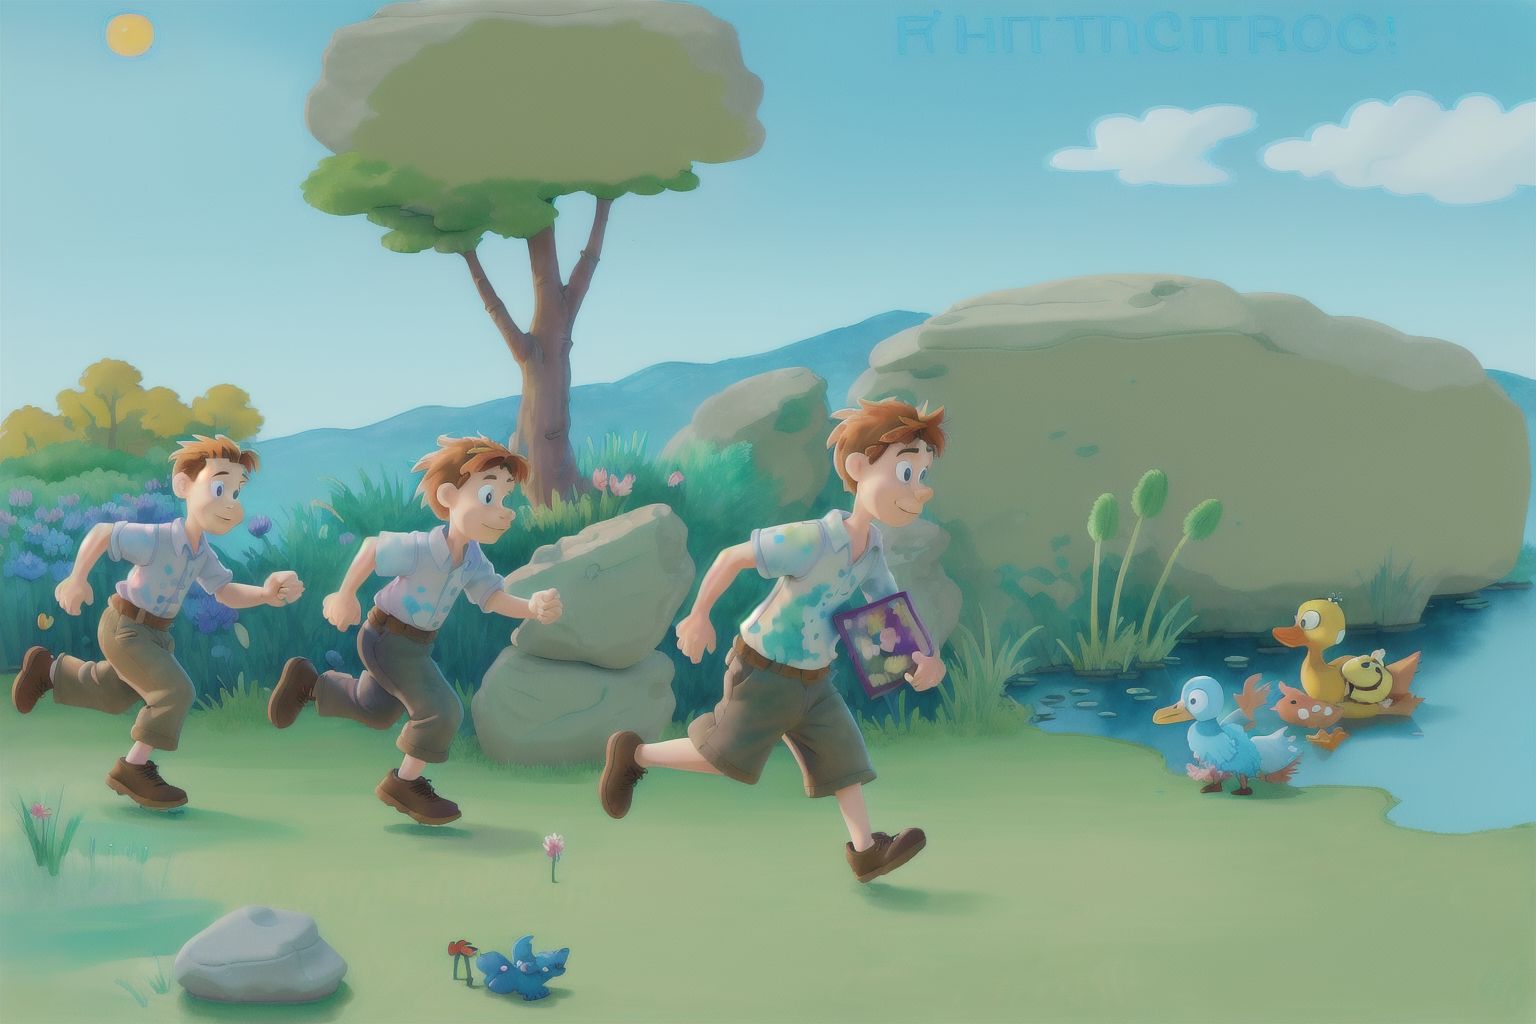
No AI art will be perfect, but some are less perfect than others. Let's circle some of the problems:
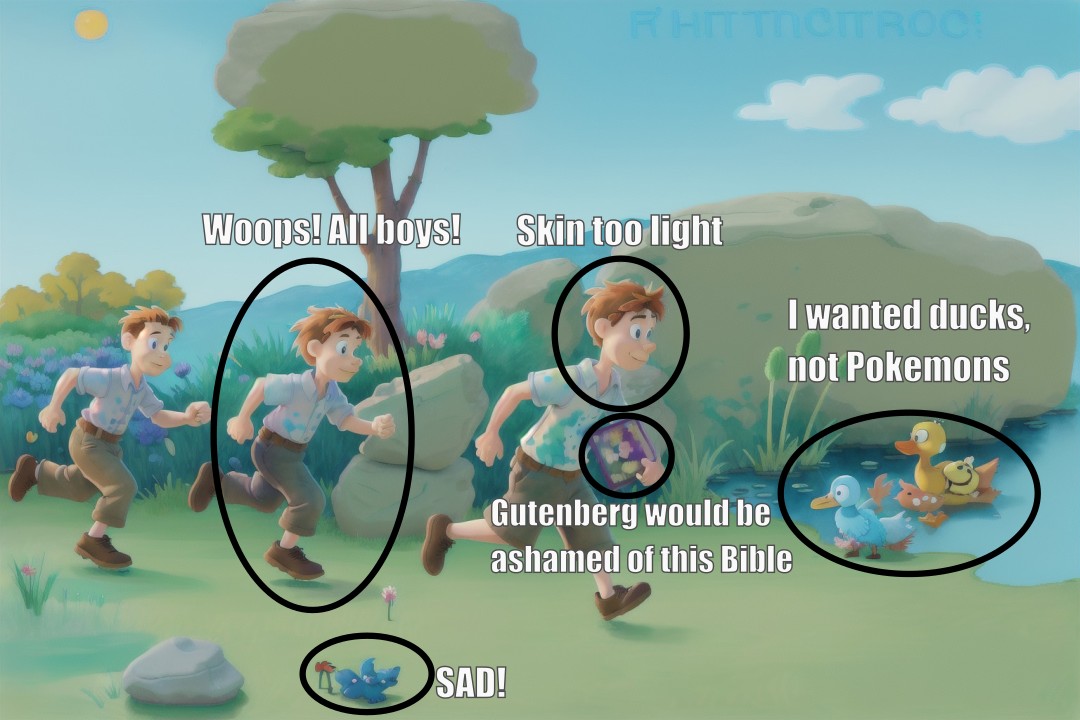
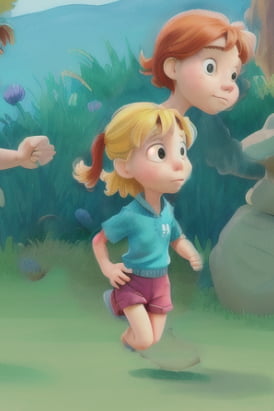
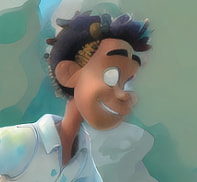
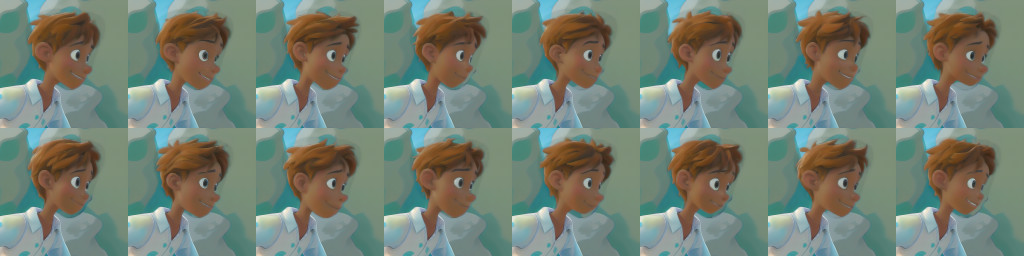
Inpaint 1: The Girl
What girl? Well, that's the problem! The middle person was supposed to be a girl, but instead we got three boys all wearing shirts and slacks. I opened the picture in Affinity Photo (think Photoshop but it's fast and doesn't cost infinity dollars). I used Affinity's smart "Selection Brush" tool to select the middle boy, and created a black-and-white mask.
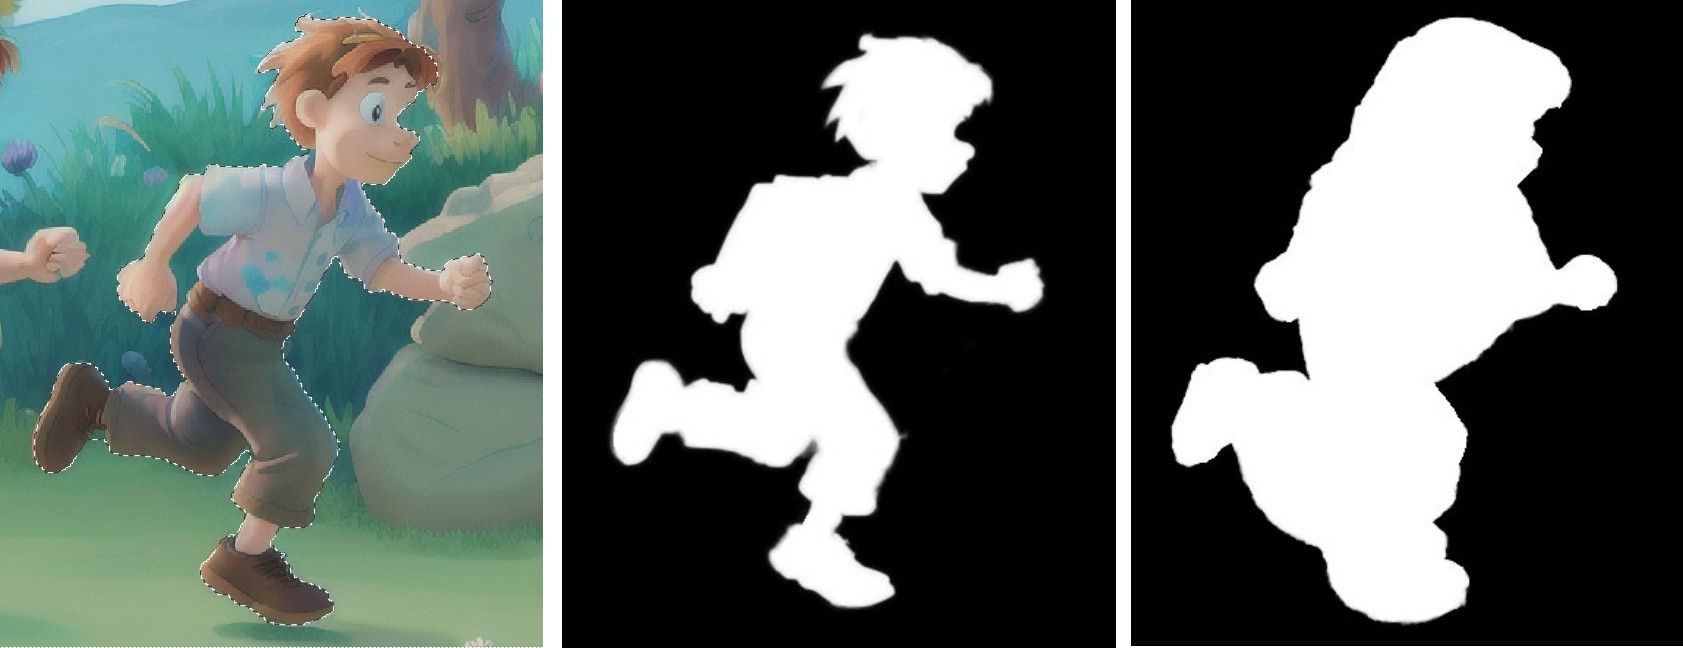
I added to the masked area so that Stable Diffusion would have a larger area to work with. So let's see what we get with the default inpainting settings and a prompt of "watercolor illustration by bill watterson of girl running, style of calvin and hobbes, profile"
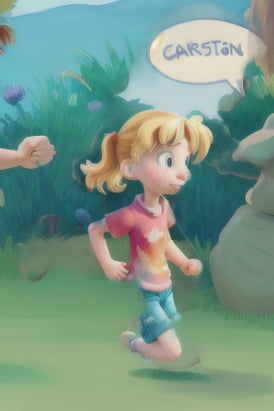
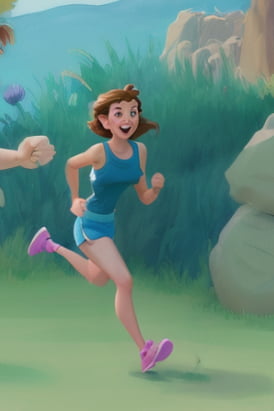
OK, I was clearly doing something wrong. When inpainting, there's an important setting called "denoising" and it scales from 0 to 100%. In simple terms, it determines how much of the image is allowed to change. Zero would be no change, and 100% would mean "generate something completely new". The default setting is 75%, which is obviously too high for what I want.
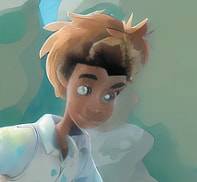
Reducing the denoise percentage down to 50% kept the image more in line with the original, and gave me something much better to work with.
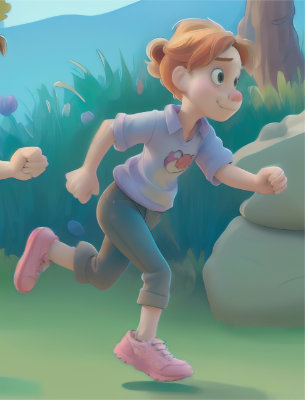
This was the best result, but it could use some work. The way the shirt bunches up is a bit weird, and she's wearing the same brown shoes as everyone else, which is a bit boring. I first masked out the problem areas of the shirt, inpainted it, and then loaded the result in Affinity and applied a pink coloring to the shoes. Then I sent that back to Stable Diffusion and inpainted the shoes to make them look more like sneakers. I did also did a little inpainting of the eyes since there were a few strange artifacts.
Inpaint 2: The Bible
To get a better looking Bible, I knew I wasn't able to rely on Stable Diffusion to just paint what I wanted. I added a very rough sketch of a blue bible with a yellow cross in Affinity, and sent that to Stable Diffusion for inpainting with a low denoise percentage.
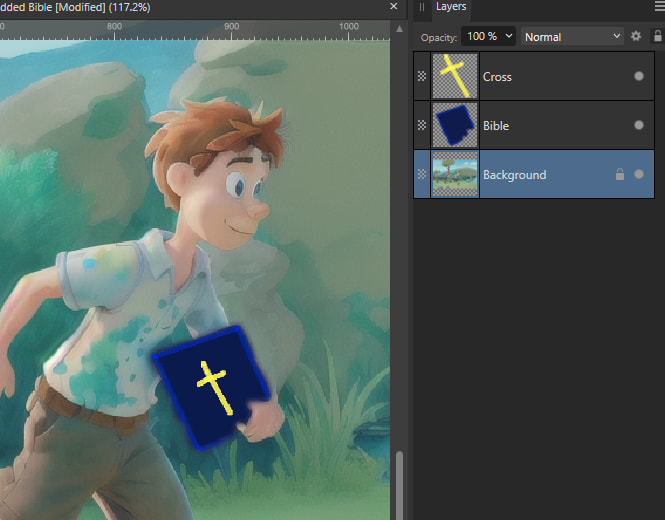
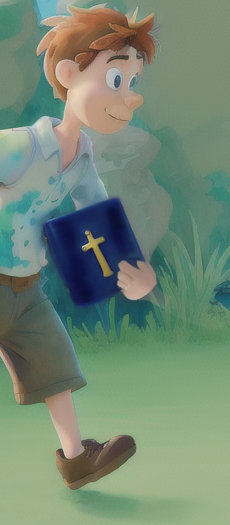
I also inpainted (slightly) better hands. It didn't have to be perfect because I wasn't going for photorealism.
Inpaint 3: Skin tone
I was trying to be faithful to the original drawing, so I wanted to make the boy in front's skin tone darker. My first attempt used the same technique as inpainting the girl, but I only masked out the limbs and face. This turned out to be mistake, as seen in the following nightmares:
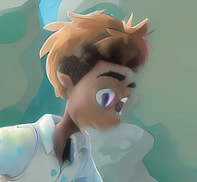
And here's a bonus terror where I cranked up the denoise and forgot to mask out the boy:
The above image, while a mistake, did have some good inpainting on all three of the kids. The problem is that it was becoming too 3D cartoon, not enough illustration. To fix this, I did two things.
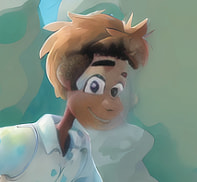
One: manually adjust the boy's skin tone in Affinity. This was simple old fashioned image manipulation, just painting a darker brown over the skin and picking a good blending method. This helped preserve the watercolor shading of the original.
Two: Bring in ControlNet to help with the Stable Diffusion inpainting. ControlNet is an extension of Stable Diffusion that lets you use a variety of methods to influence the final result. Two issues I kept seeing were 1) The inpainted faces weren't turned the right way and 2) the style would be too different. Technical note: this occurred whether or not I used the "Inpaint masked only" option.
I added two ControlNets: OpenPose and Reference. I used the boys face to create a wireframe pose, which helped the inpainted face to be in the right orientation. I used a cropped version of the image with the Reference ControlNet, which helped it keep the same style.
Instead of sending the entire image through the Stable Diffusion system, I cropped a square area out of the image. I started getting the results I wanted, and was then able to easily paste the winner back into the original image.
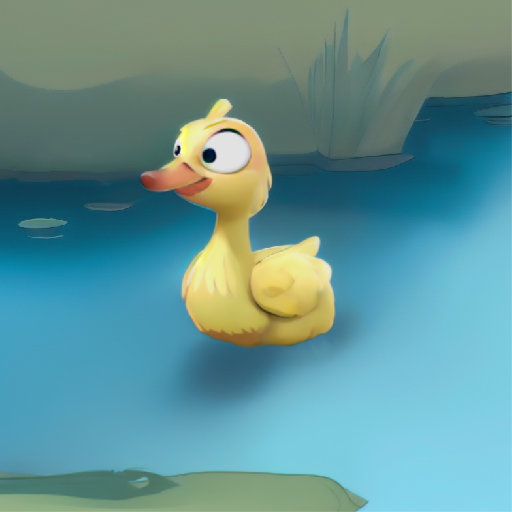
Inpaint 4: A Duck!
Now it's time to get rid of the ridiculous mutant ducks. However, despite all the stuff I corrected with inpainting, I could not get a coherent duck in the right style. So I decided to first erase the ducks that were there, and then generate new a new duck as a completely different piece, and paste the result into the image.
To erase the ducks, I used a different AI image tool called Lama Cleaner (check the demo on their page, it can really do all that quite easily). I simply painted over the ducks in Lama Cleaner, and it almost magically erased them.
Then I used Stable Diffusion to generate a bunch of new ducks, like this guy:

So I cropped him out, pasted him into the image, and did some editing like muting the colors, removing some of the details in the feathers, and adding a shadow to the water.
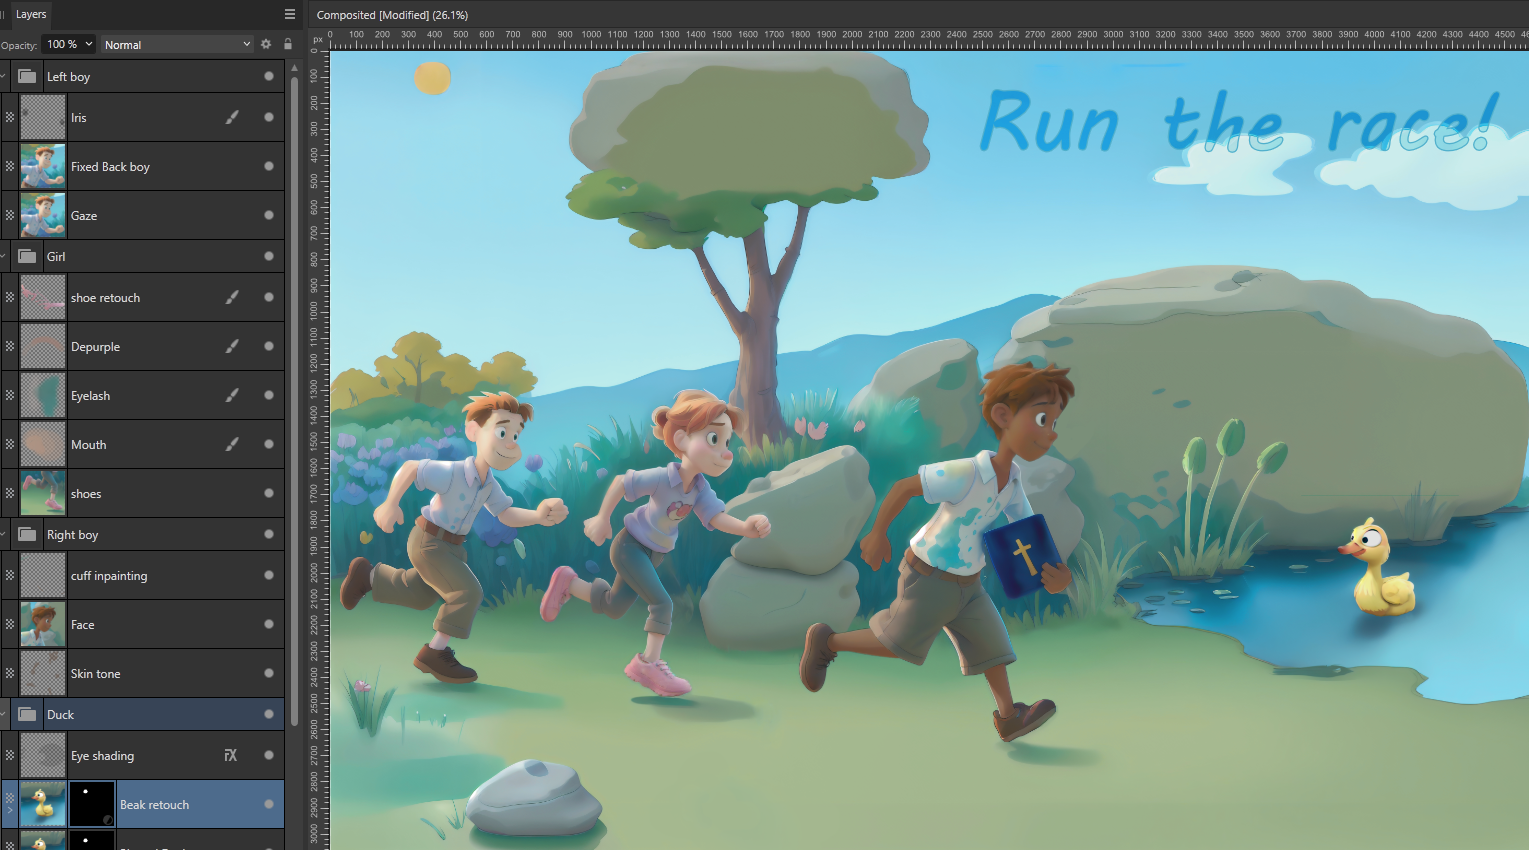
Finalizing: Editing in Affinity
After all that and some upscaling (using ControlNet Tile and Tiled Diffusion), I brought the image back to Affinity Photo and did some retouching.

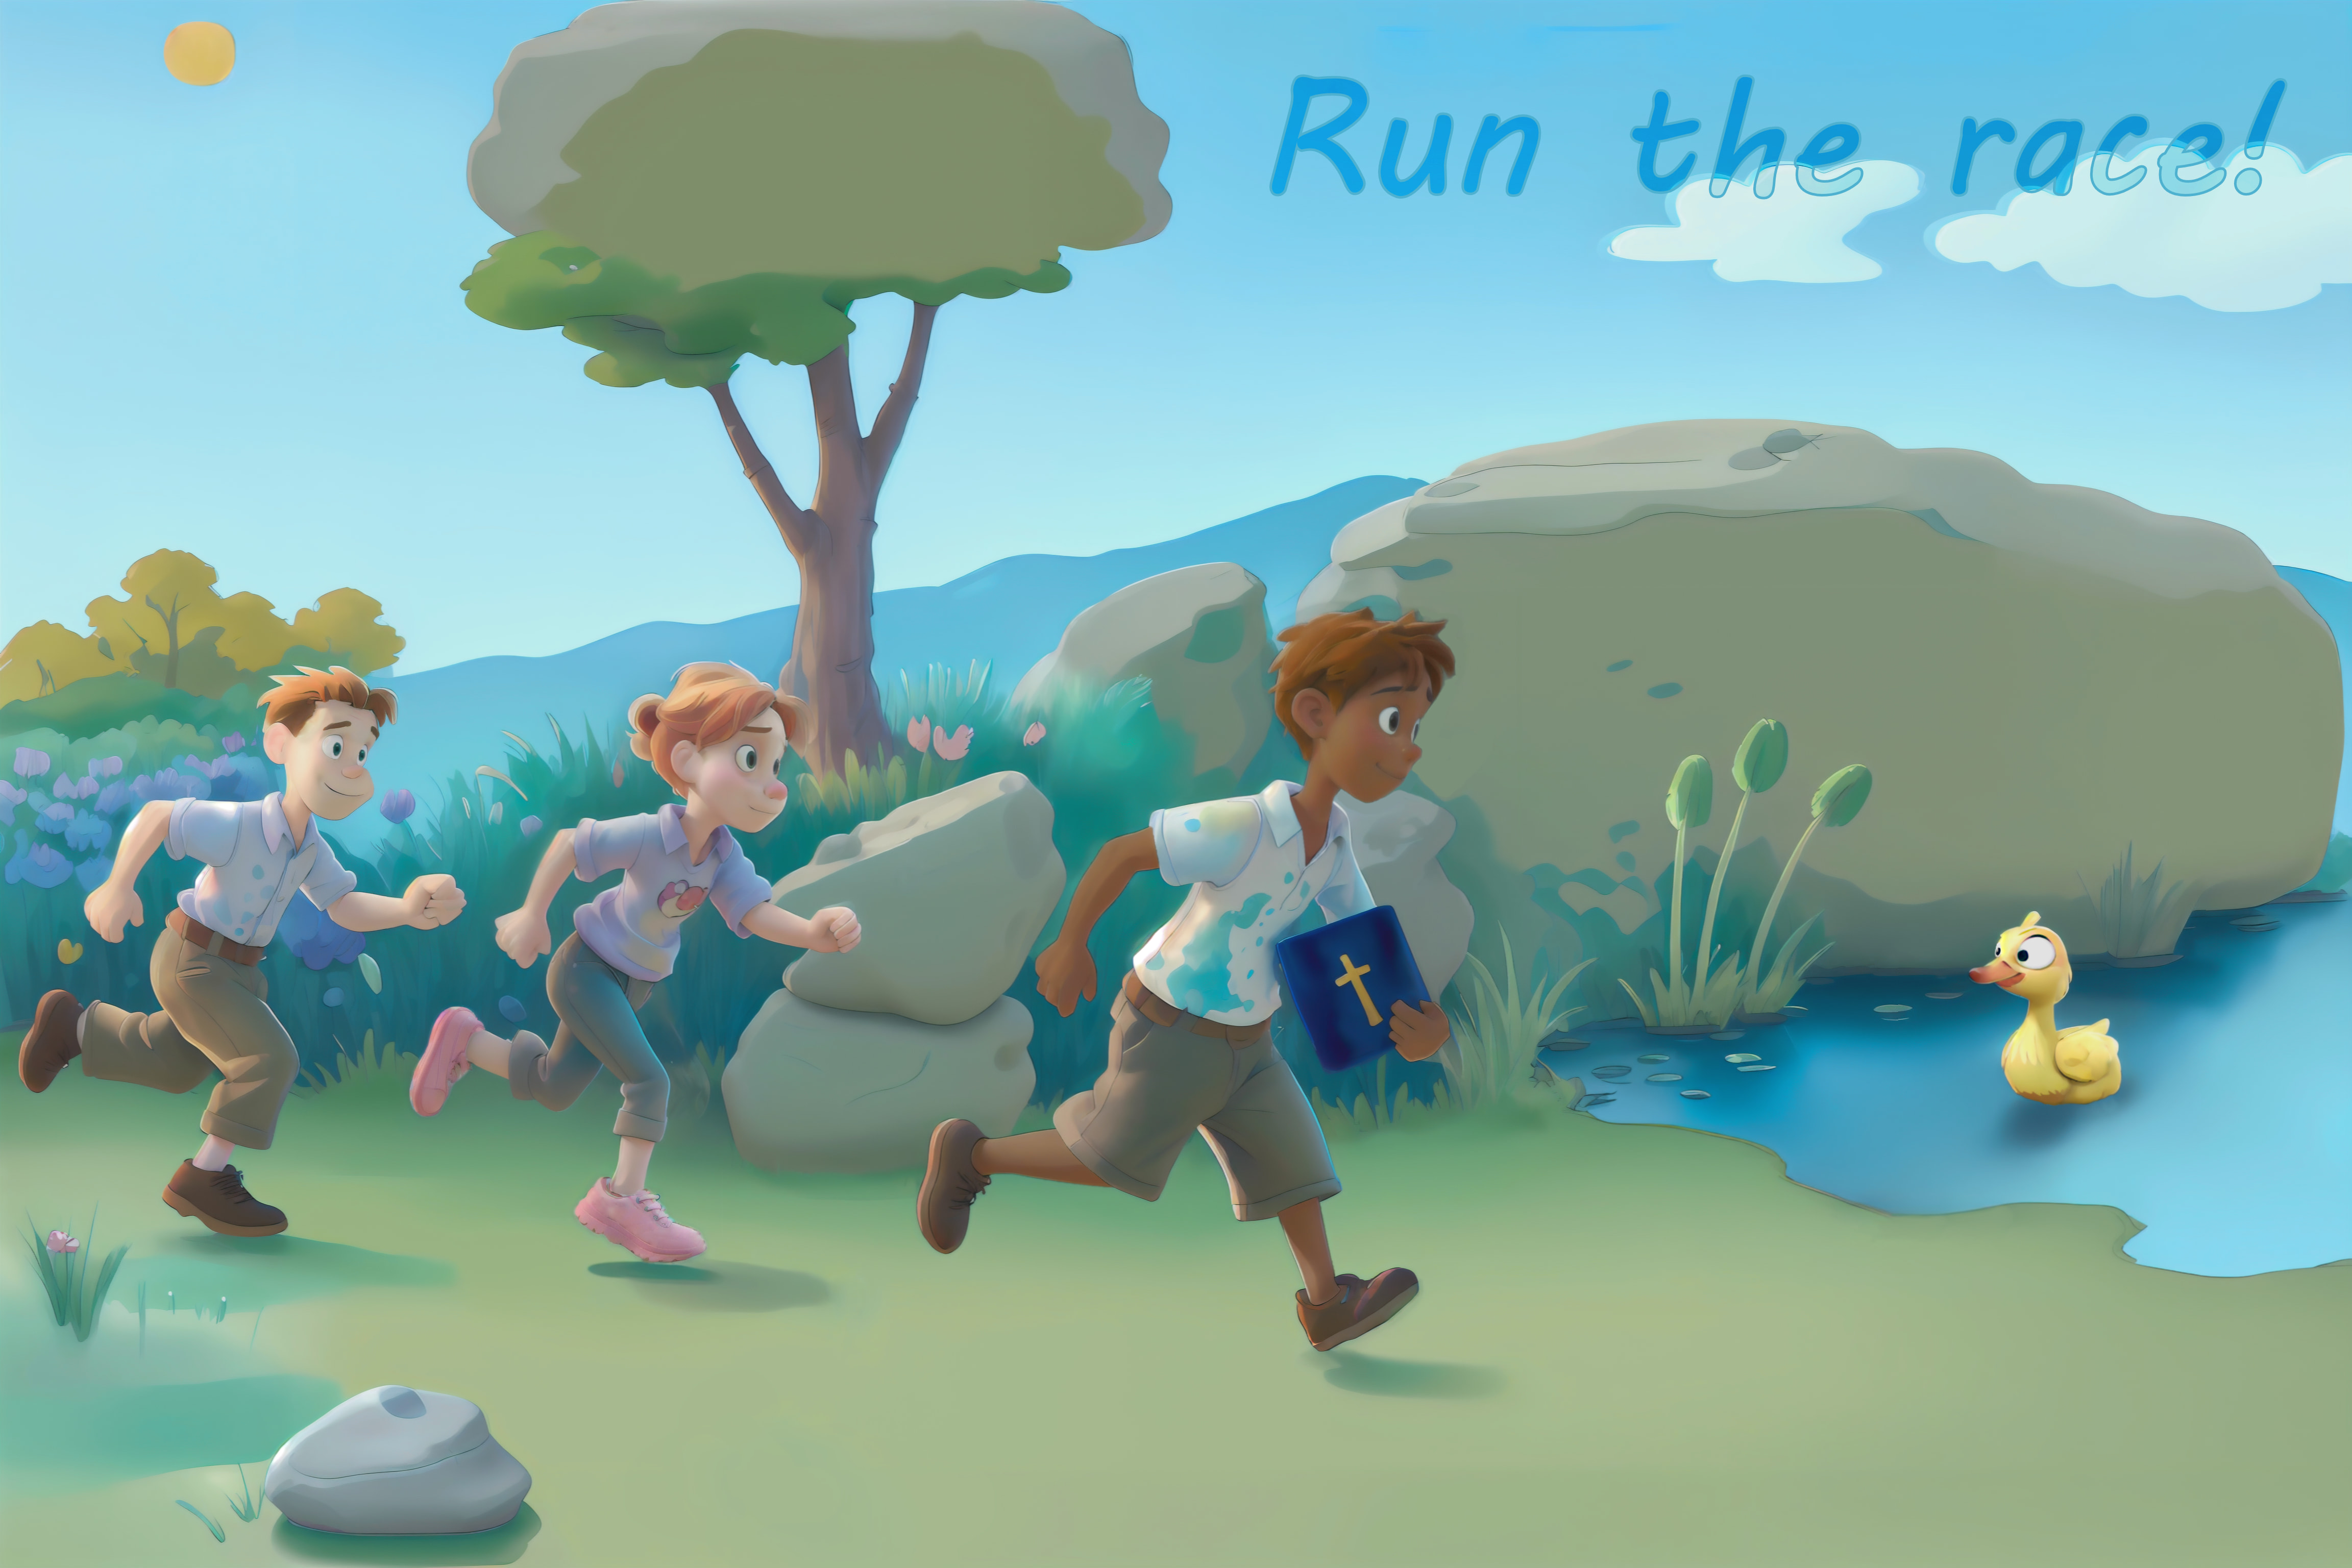
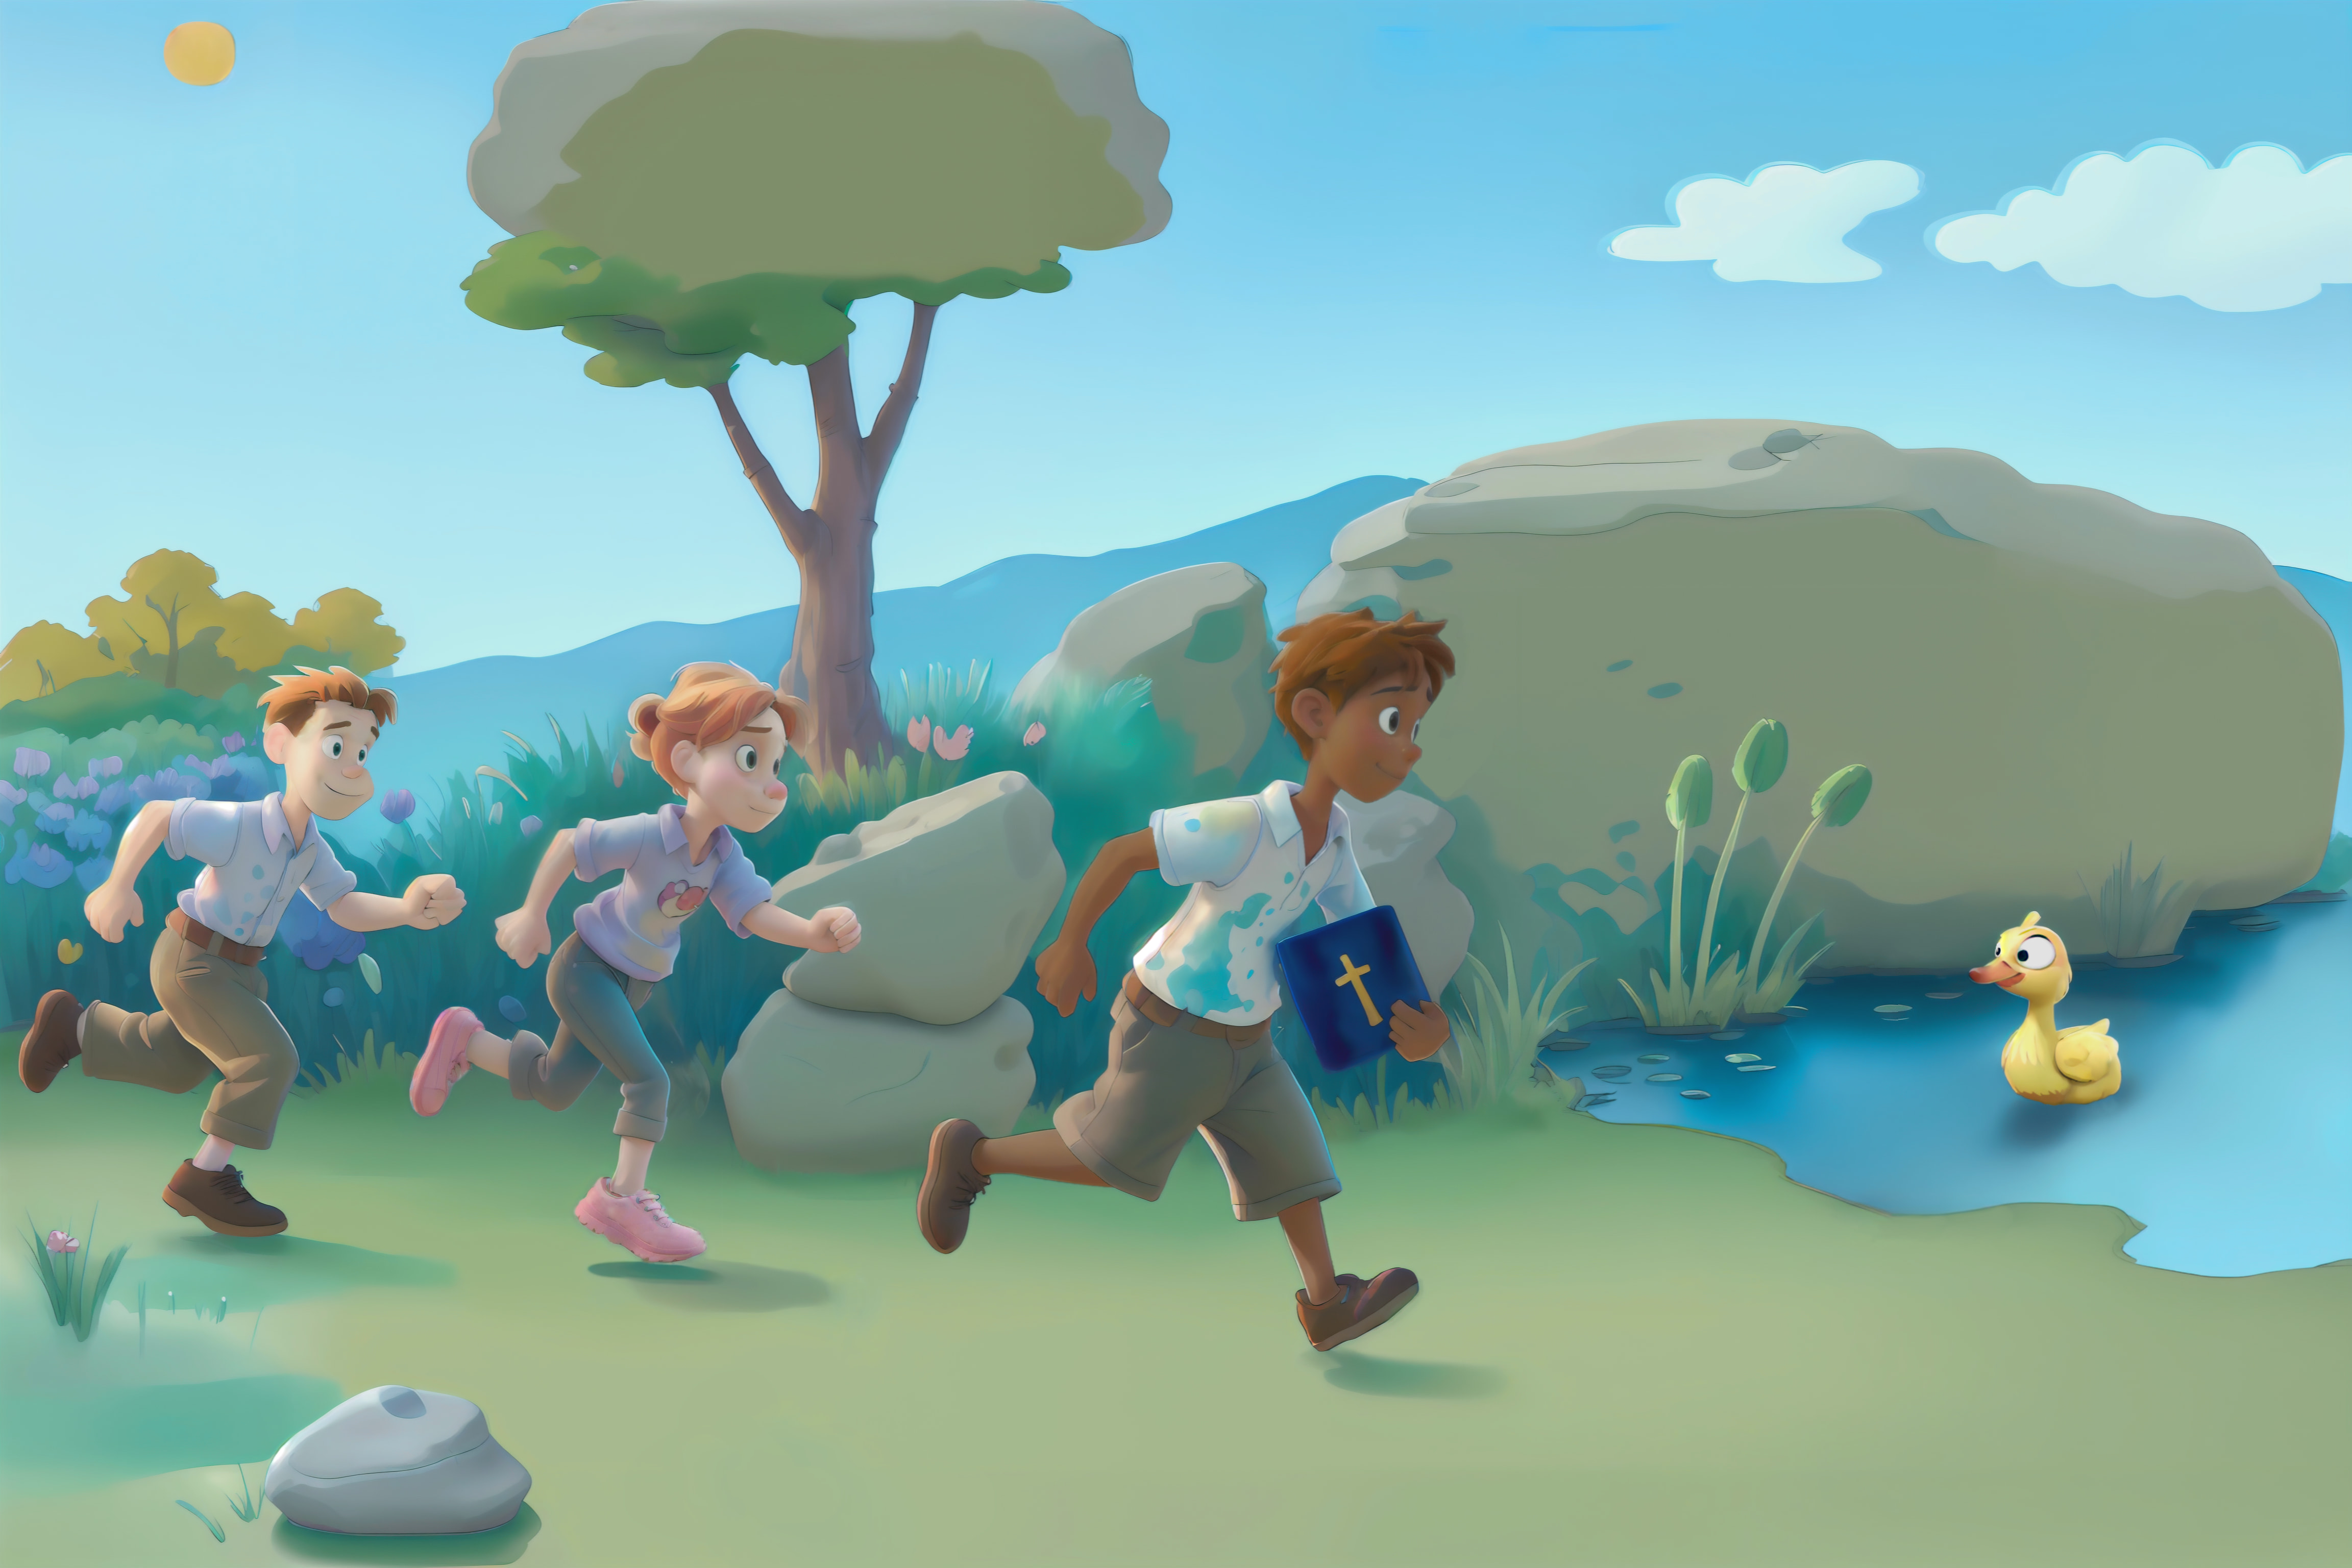
And there we have it! The final version is 4,608 x 3,072 (14 megapixel). The full resolution is available here with caption and here without a caption.
Comments